AWS EC2 Free Tier and Dify 0.12.1 Experience
Translated by GPT4o from my original chinese page.
The Dify official site already has detailed deployment tutorials, and you can find guides on Bilibili or YouTube too, so I won’t repeat those here. For source code deployment (the main method in this article), once you’ve cloned the repo, the key is to follow the steps in the README.md files under the dify/api and dify/web folders step by step. This post focuses on deploying Dify on AWS and some pitfalls I encountered.
Tools used:
- AWS EC2 (LightSail is simpler but only free for three months, while basic EC2 is free for 12 months)
- Git
- Python 3.11 (Dify 0.12.0 and later only supports Python 3.11+)
1. Launching an AWS EC2 Instance and Connecting via VS Code
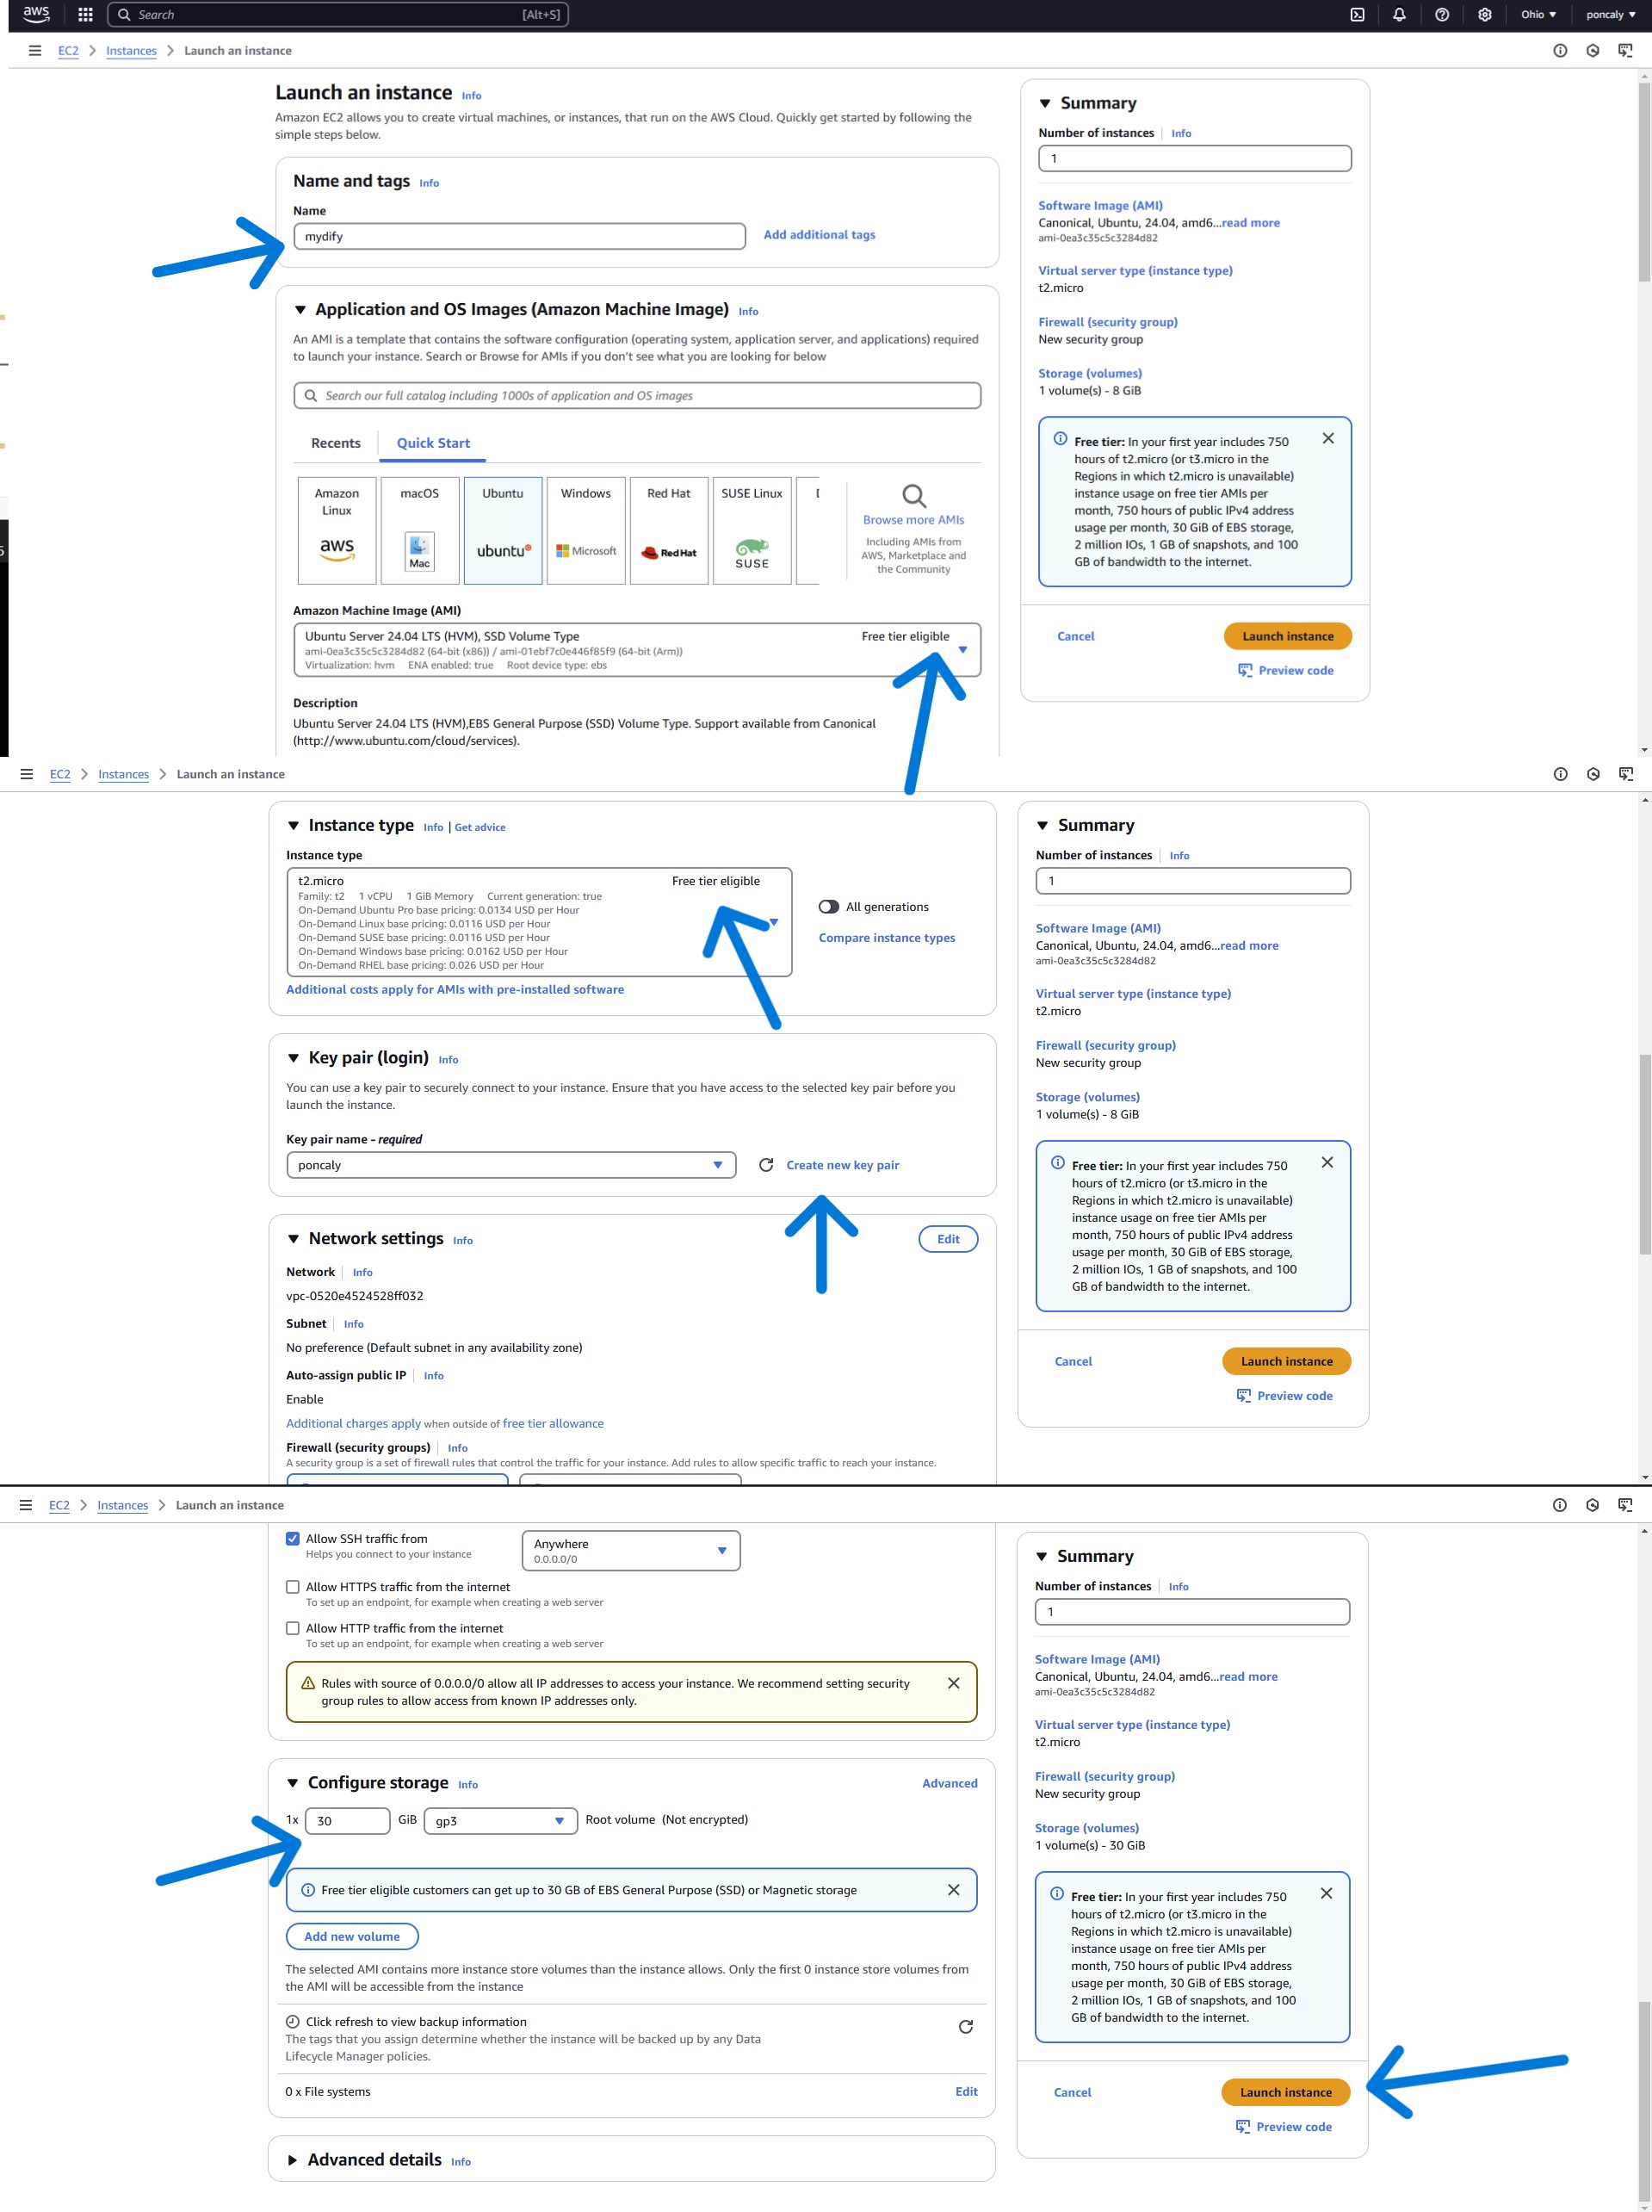
After registering with AWS, search for “EC2” in the top-left search bar, click on the first result, and then click “Launch Instance” to create a new instance.

In the instance creation page, select Ubuntu as the operating system and an instance labeled Free Tier Eligible (no restrictions for paid users).
If you don’t have a key pair, make sure to create and download one—this is essential for connecting to the server later. Once configured, launch the instance and wait for it to start.
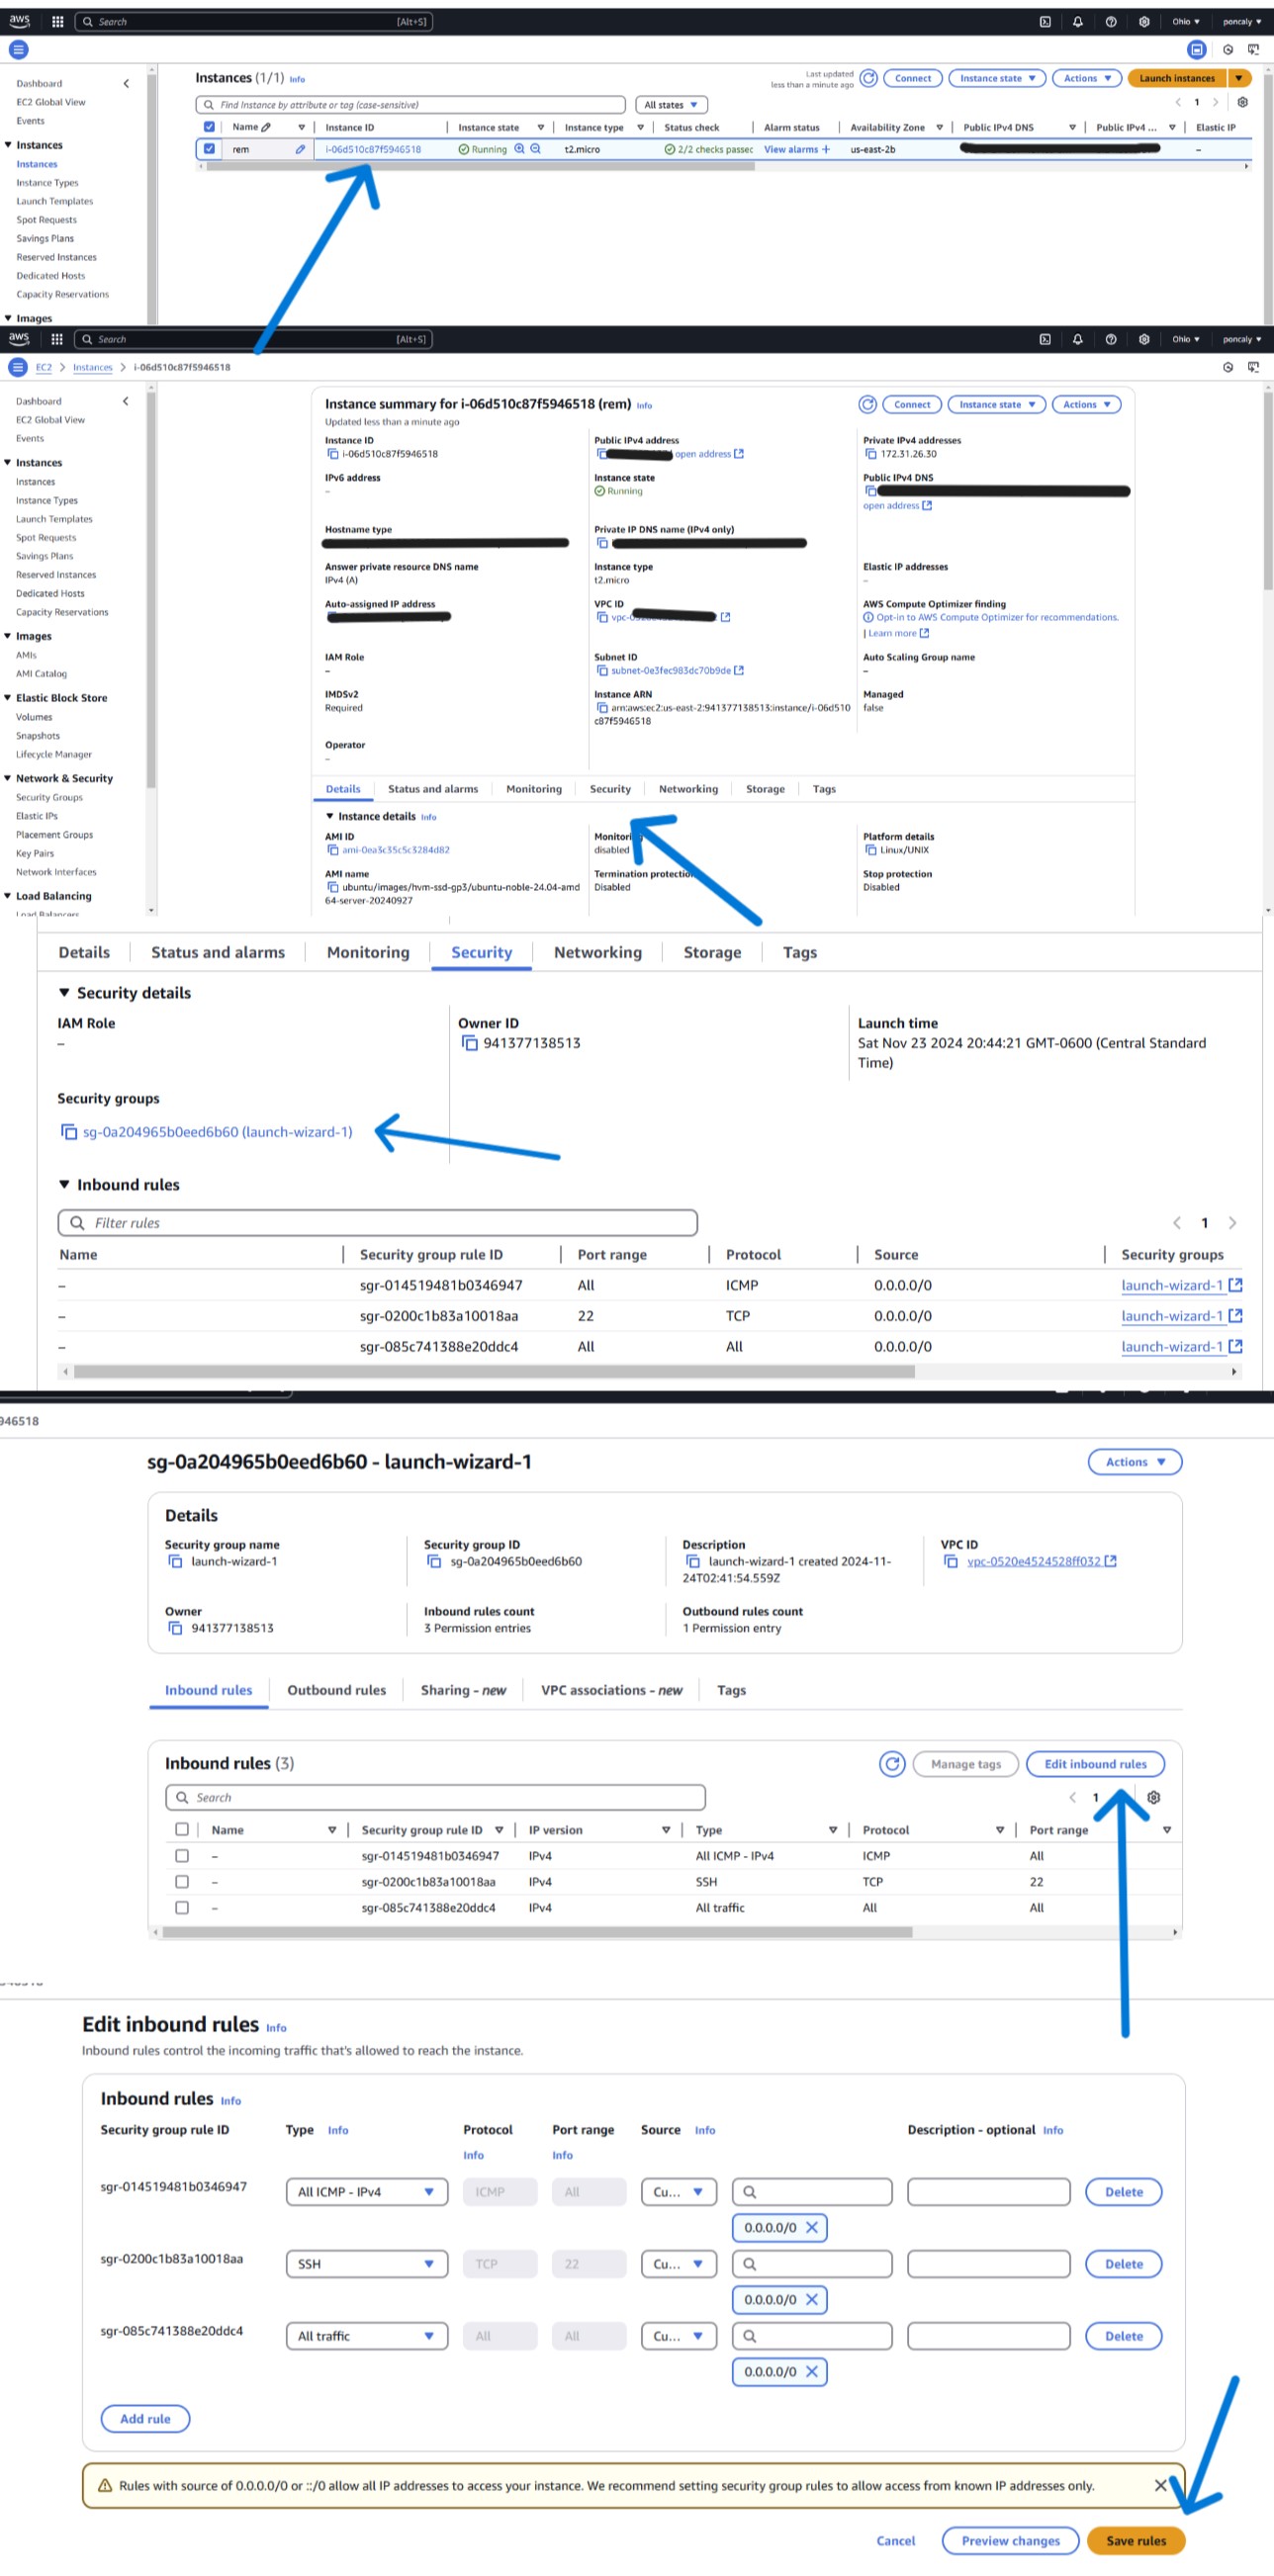
Go back to the main EC2 page, where you can view your created instances under the “Instances” section. Configure the security group to allow connections from your local browser to the Dify server later.

VS Code is fantastic for SSH connections. Follow this tutorial for details.
The key mentioned in the tutorial is the key pair we created earlier.
2. Running Dify
The rest of the process is identical to the local installation tutorial for Dify.
Here are a few key points to watch out for:
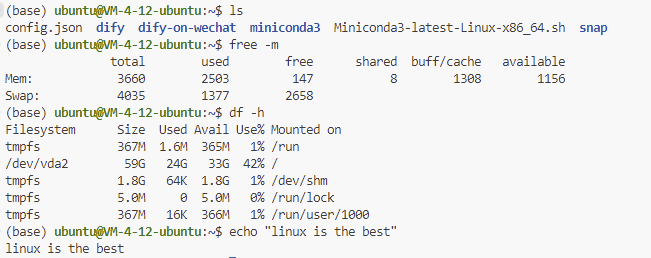
Since the free EC2 instance has limited performance (1 GB RAM), most tasks won’t run. You can use swap space (using disk as virtual RAM), but this makes compiling extremely slow. If you can, go for a better server… I recommend a server with at least 2 GB RAM (even then, you’ll need to configure swap space).
To configure swap space:
sudo fallocate -l 4G /swapfile  # Create a 4GB swap file
sudo chmod 600 /swapfile        # Set file permissions to 600 (read/write for root only)
sudo mkswap /swapfile           # Format the file as swap space
sudo swapon /swapfile           # Enable the swap file
swapon --show                   # Display enabled swap spaces
/swapfile none swap sw 0 0      # Add swap configuration to fstab for persistence
free -m                         # View memory and swap usage
To connect your local machine to the Dify platform hosted on the server, update the 127.0.0.1 parts in both dify/api/.env and dify/web/.env.local files to the appropriate server IP address.
Important: Do not modify the CODE_EXECUTION_ENDPOINT line:
# CODE EXECUTION CONFIGURATION
CODE_EXECUTION_ENDPOINT=http://127.0.0.1:8194
99. My Dify Mini-App (Laopo)
Available on my Chinese page. Feel free to check it out here!


